
Saturday, March 10, 2012
Sunday, February 26, 2012
Motivational Plaque

And to go along with this wonderful motivational running plaque are 4 large red checkmarks to affix once achieved.
Thursday, February 2, 2012

Friday, January 13, 2012
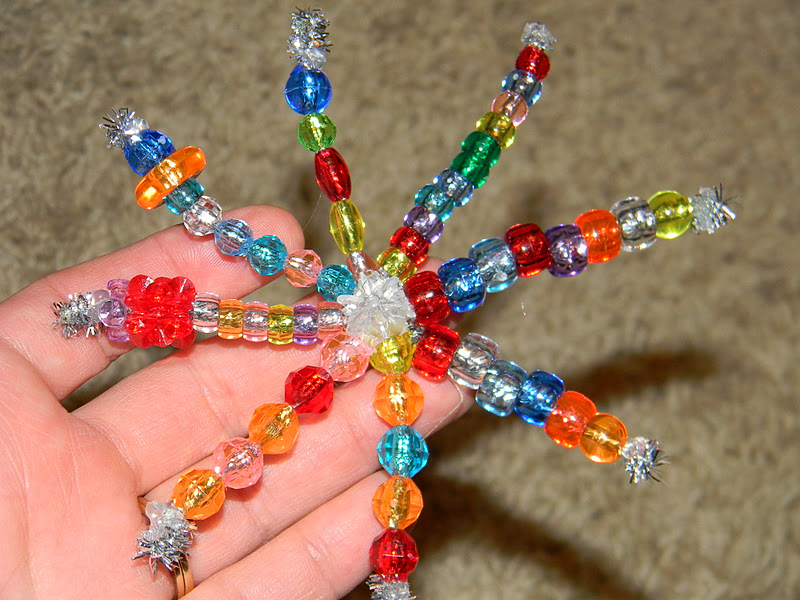
Snowflakes
Did you know National Make Cut Out Snowflakes is December 27th?
Yeah I didn't either.
Eh, so we're a little behind. No big deal.
1. Start with a square piece of paper.
2. Fold in half
3. Then fold in half again length wise so it makes a small square

4. Fold in half diagonally so it makes a triangle.

5. Draw a line here and here


and don't forget over here.

7. Cut out and enjoy your beautiful creation.

You can also make beautiful snowflakes by using up all those leftover beads from other random projects and pipecleaners. For added dimension I highly recommend buying a pack or two of actual "snowflake" beads.


Thursday, December 15, 2011
Homemade Hot Chocolate
1 - 16 ounce canister non-dairy Coffeemate creamer
(generic works just fine)
(to jazz up your hot chocolate, buy a flavored coffee creamer)
(generic works just fine)
(to jazz up your hot chocolate, buy a flavored coffee creamer)

1 - 2 pound canister Nesquick

5 - 1 quart packets instant dry milk

2 cups sifted powdered sugar

Mix together.

Scoop into desired jar adorned with Christmas tag and Nativity bracelets you forgot to pass out last year.

Sunday, October 9, 2011
Fall Fun
Start with some oven bake clay:

Cut off a few hunks of your favorite falls colors:

Knead them until they are soft, then smoosh them into a ball:

Roll out the clay to about 1/8-1/4 inch with your rolling pin:

Cut out leaves using leaf cookie cutters:
(mine were purchased from Walmart a few years ago. Amazon.com is a wonderful shopping place if you can't find any fall cutters locally)


Here's added bonus fun part.
The more you cut and re-roll out the clay, the more random and unique your leaves become:


Poke holes in your leaves before baking if you want to make a fall leaf mobile or to wear as a necklace. But if you forget, you can always drill holes in afterwards.
Bake according to package directions.
Have Fun!
Tuesday, August 23, 2011
Signs for any occasion

Sorry the picture isn't so clear.
This is the 'Happy Fathers Day' sign Bree and I made for Jim but the concept can be used for any occasion. Not to mention its a great small motor skills and learning project as well. And all it took was some leftover scrapbook paper, my cricut, scissors and a glue stick!
Using a tie pattern, we traced one tie for each letter of our sign.
(Helps with them learn how to trace.)
Then cut them out.
(Helps teach them to cut on a line.)
Using my cricut, we cut out all the letters of our sign.
(Helps with letter recognition.)
Then we glued the letters onto the ties.
(Good practice for preschool.)
You can either string them together or just tape them individually to the wall!
As I said before, the concept of this sign can be used for any occasion. Use a balloon pattern to make a 'Happy Birthday' sign. Or pumpkin pattern to make a 'Happy Halloween' sign. Or Christmas light bulb pattern to make a 'Merry Christmas' sign. Or just use random shapes to make a sign for their door that has their name on it.
The possibilies are about as endless as the scrapbook paper used to make them!
And, if you're really fancy, you can use material and pellon to make a more permnant, reusable banner.
Subscribe to:
Posts (Atom)